














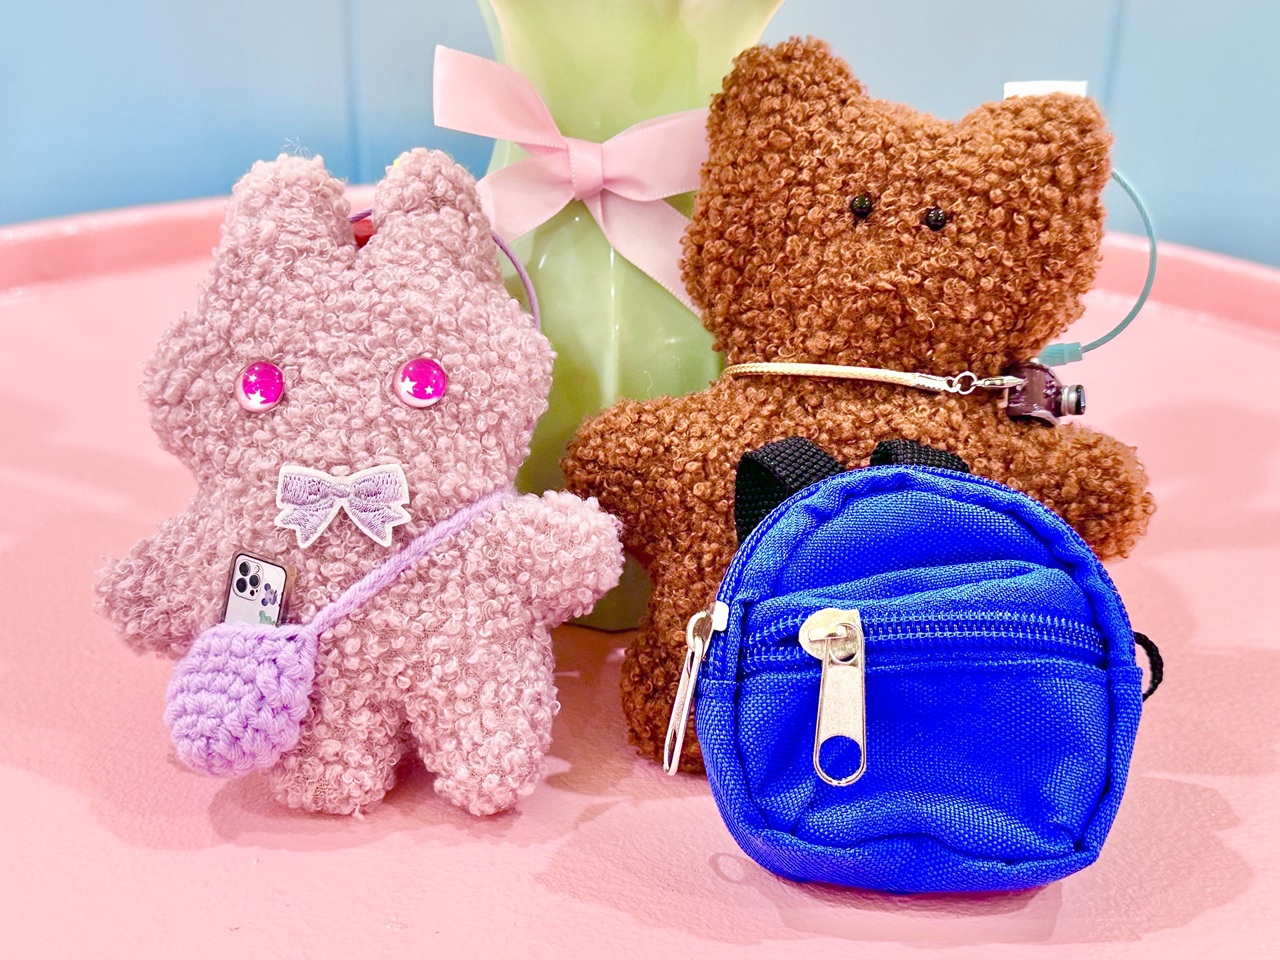
Going out with your favorite stuffed animal, taking pictures, and sharing memories—"Nui-katsu" has now gone beyond a fleeting trend and become established as a culture in itself. Recently, people have moved beyond simply appreciating ready-made products and are increasingly creating their own "one-of-a-kind original stuffed animals," with craft stores displaying related books and special sections becoming more common.
However, even if you want to make one yourself, many people hesitate, thinking, "I don't know where to start," or "I'm clumsy to begin with…"
For those people, we recommend visiting "YASUMI LAB TOKYO," which opened in Ikebukuro in May 2026. This shop holds daily hands-on workshops where you can create your own original plush toy strap , and anyone can easily participate without any preparation.
I saw a promotional statement that said, "Even if you're a complete beginner at sewing, our staff will provide thorough support from the basics," but can I, someone who absolutely hates sewing, actually complete my "ideal companion"?
With a mix of excitement and apprehension, I immediately went to the store to conduct an interview!
We'll introduce you to the workshop, along with some advice for beginners.
*This article is based on information available at the time of reporting. Please note that it may differ from the latest information.
Location: Room 102, Maison Fuji, 4-29-2 Ikebukuro, Toshima-ku, Tokyo
*Approximately 10 minutes on foot from the west exit of JR Ikebukuro Station.
Opening hours: [Monday-Friday] 15:00-20:00 [Saturday-Sunday] 11:00-20:00
Basic fee: 4,900 yen (tax included)
* There is a campaign running until June 30th, 2026 (Tuesday) where the basic fee is 3,900 yen, but the price may change in the future, so please check the official booking site for details.
*Additional charges of approximately 100 to 300 yen will be required for each option you choose, such as clothing or patches.
Estimated time: 1 to 1.5 hours
Official reservation site: https://yasumiworks.stores.jp/reserve/Yasumi-tokyo
Instagram account: https://www.instagram.com/zzzlab.tokyo
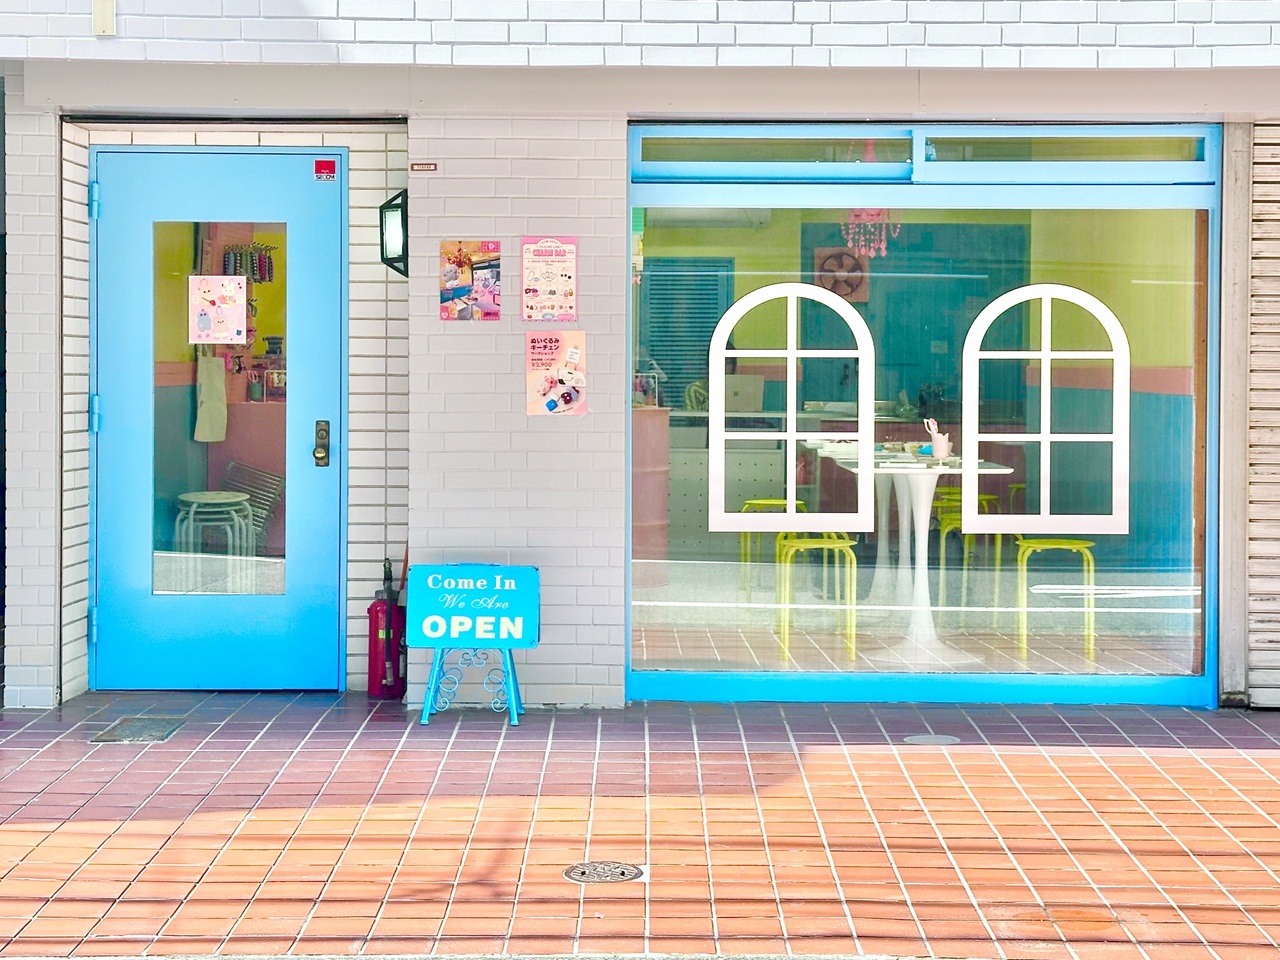
"YASUMI LAB TOKYO"
"YASUMI LAB TOKYO" offers irreplaceable time to weave your own story.
The experiential workshop store "YASUMI LAB TOKYO" is operated by YASUMI WORKS Co., Ltd., based in Nagoya. Their theme is "creating holidays," and they plan and operate experiences that stem from adults' playful spirit and curiosity.
In today's world where everything is completed online, the company values "creating something with your own hands" rather than just looking at things on a screen. They have previously developed experiential stores that incorporate trends, such as Italian charms and custom-made smartphone cases. "YASUMI LAB TOKYO" is their third store in the Tokyo area, following the Iidabashi and Shinjuku stores, and is said to be a new initiative that responds to the playful desire to "create a companion" in the age of plush toy collecting.
In line with the company's policy of prioritizing "excitement over skill," YASUMI LAB TOKYO deliberately avoids using sewing machines when creating stuffed animals, instead employing a method that involves sewing with needle and thread.
A priceless time spent alone, concentrating, or with close friends, lovers, or family, stitching together your own story and memories, stitch by stitch.
The joy of taking photos of your completed companion and sharing them on social media, or taking it out with you.
The desire to deliver both of those things led to the opening of this store.
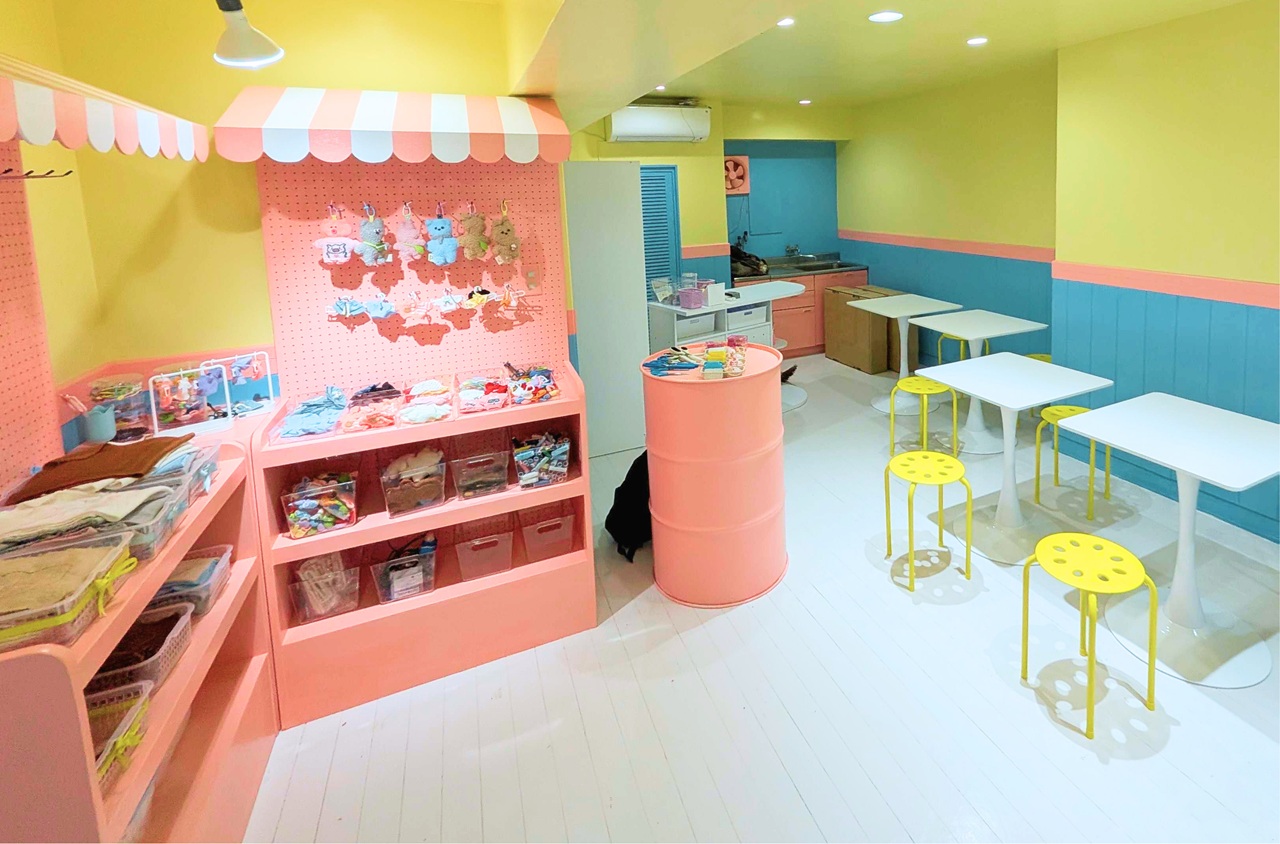
Inside the store
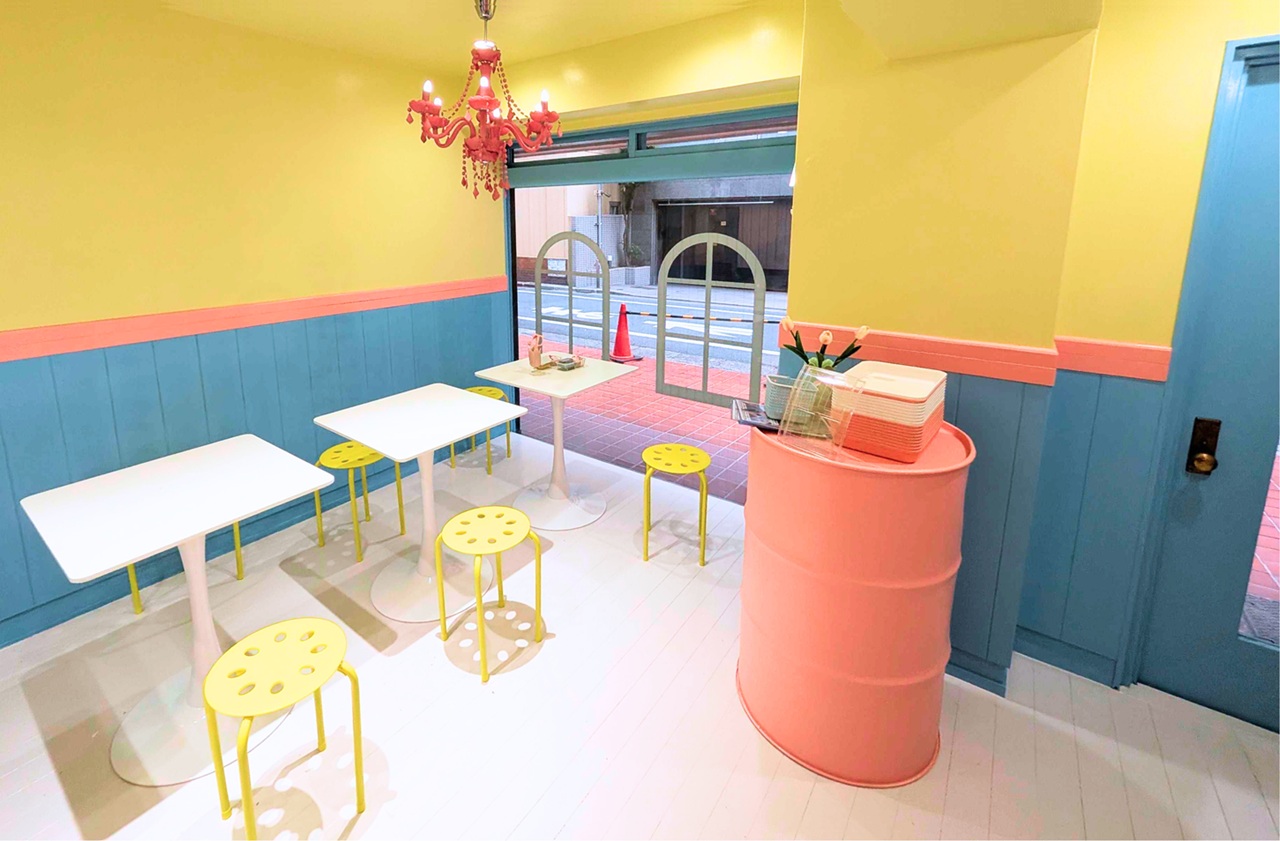
Inside the store
The cozy interior is decorated in cheerful pastel colors, with pink chandelier-style lighting and yellow chairs resembling sliced lemons. In one corner, there's a section where you can purchase optional decorative items, and just looking at them is exciting!
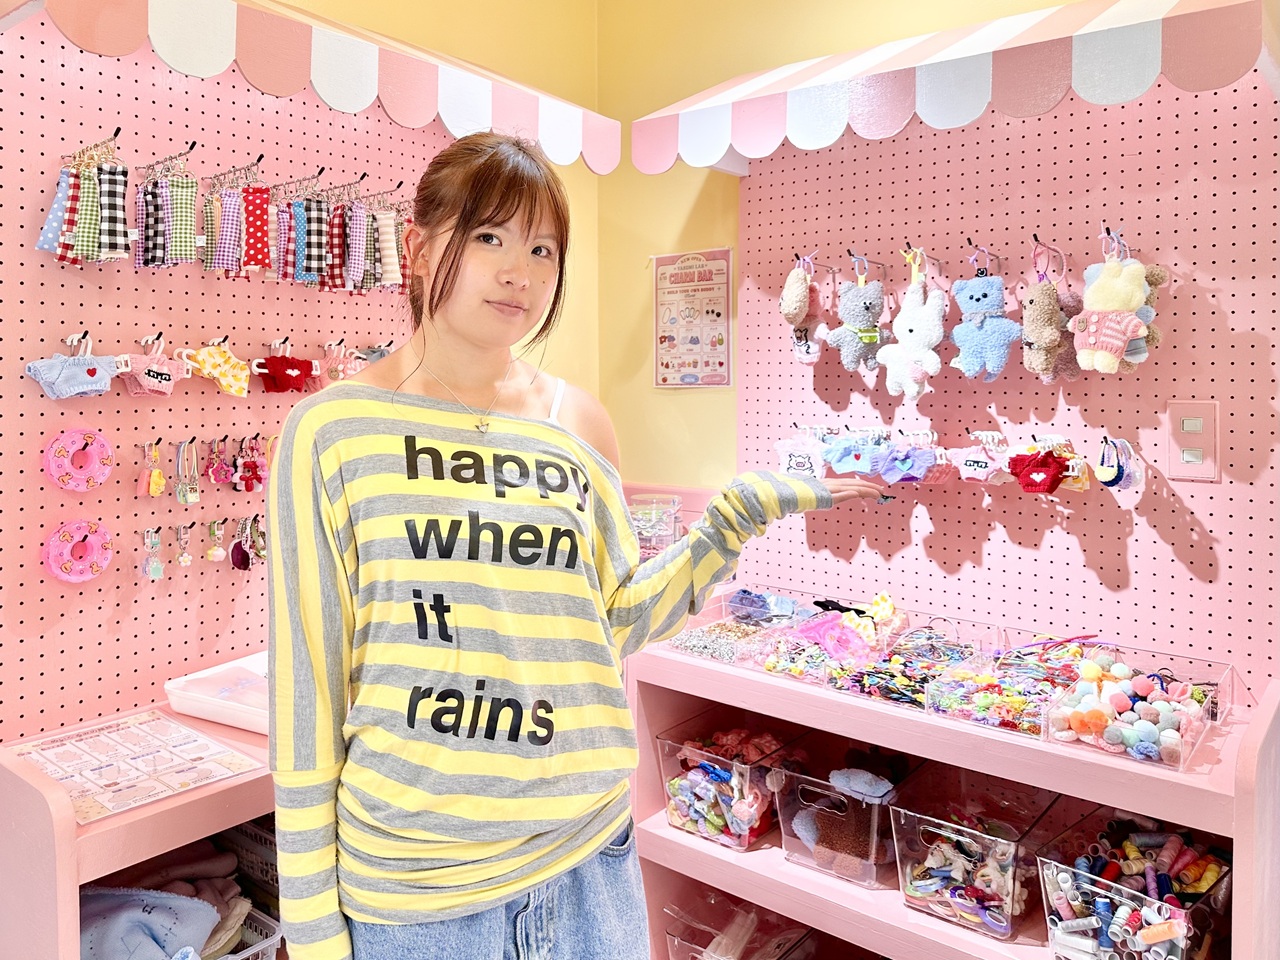
The optional corner and the kind staff who give lectures at the workshops.
Knitted sweaters, alphabet patches, fluffy tails, camera straps, and arm floats—the shelves are not the only places to find these items; the small cases are also packed with parts, so you could easily spend hours just browsing. Plus, the free straps come in a variety of colors, and you can choose between a ball chain or wire, which is a nice bonus.
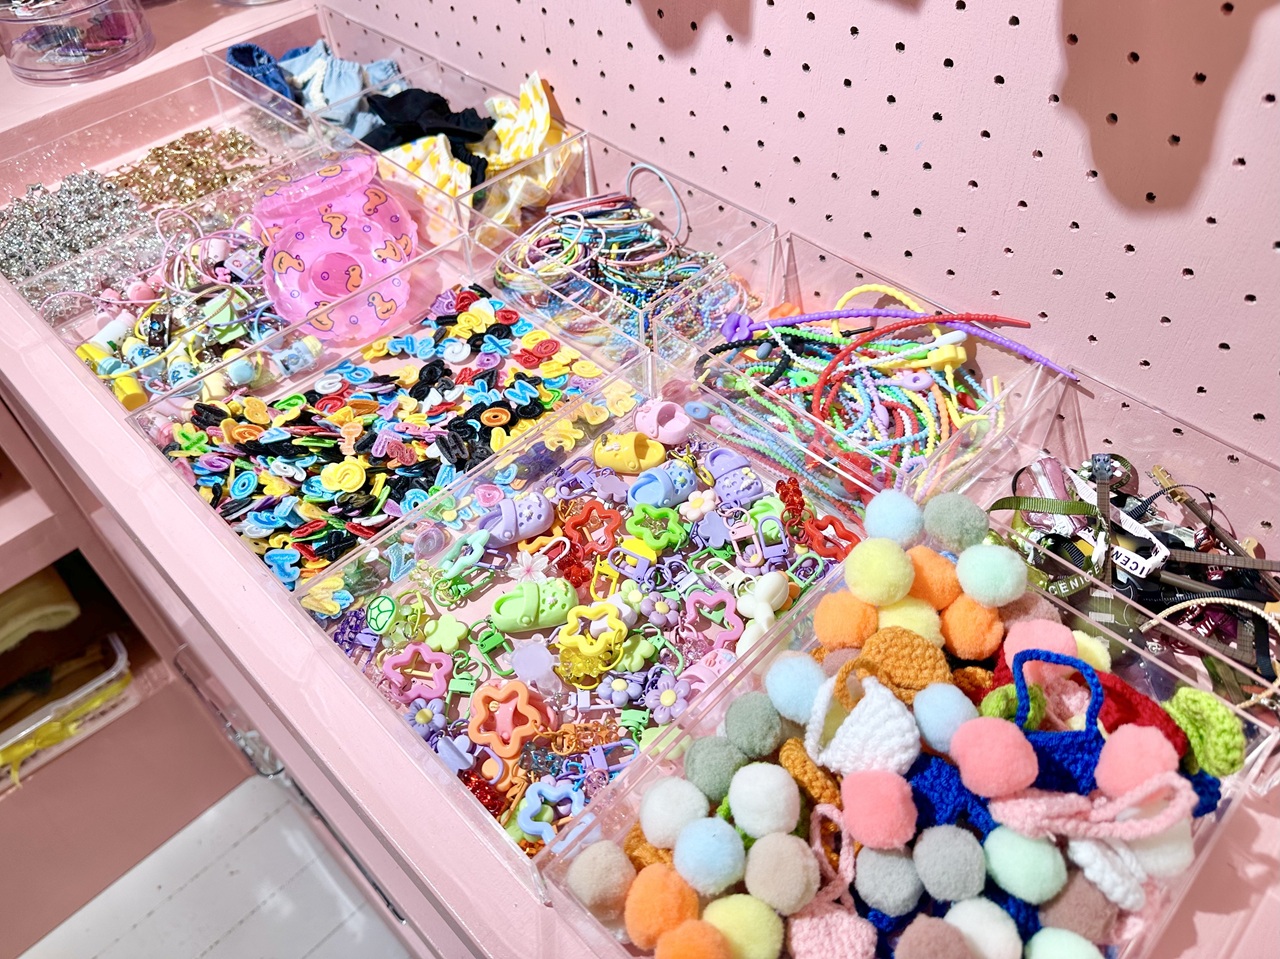
Options Corner
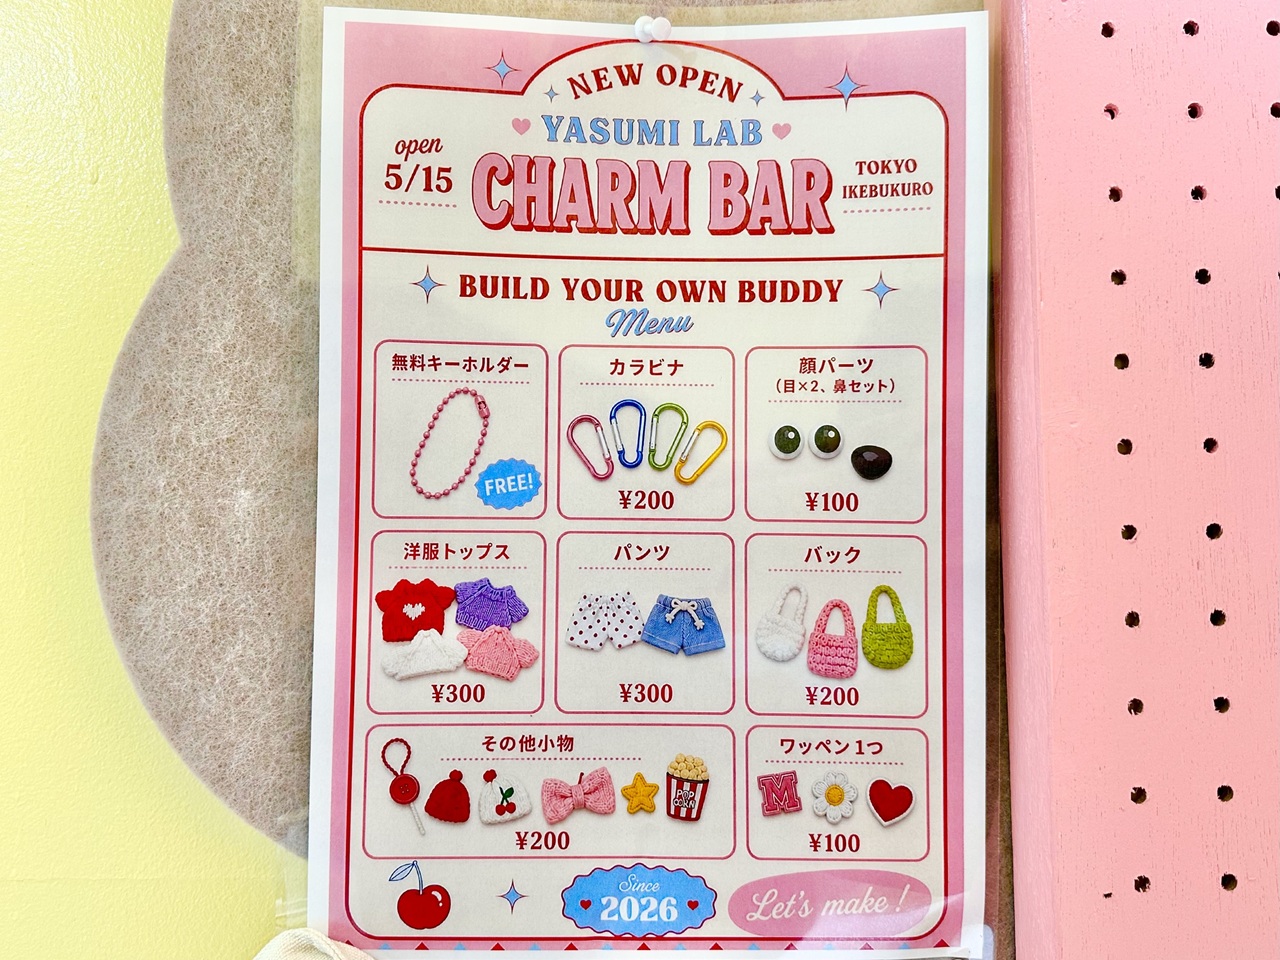
Option price list
After confirming our reservation, we were shown to our table, and then it was time to start making our stuffed animals.
[Experience Report: Step 1] Choosing Fabric
In this workshop, you won't need to go through the tedious and challenging process of creating precise patterns and carefully transferring them onto fabric. You'll start by choosing fabric that already has a pattern printed on it.
You can choose from a total of 10 shapes: rabbit (2 types), cat + pig + bear + frog (4 types), rabbit face, bear face, cloud, and moon . If you're having trouble deciding, you can refer to the finished products displayed in the store.
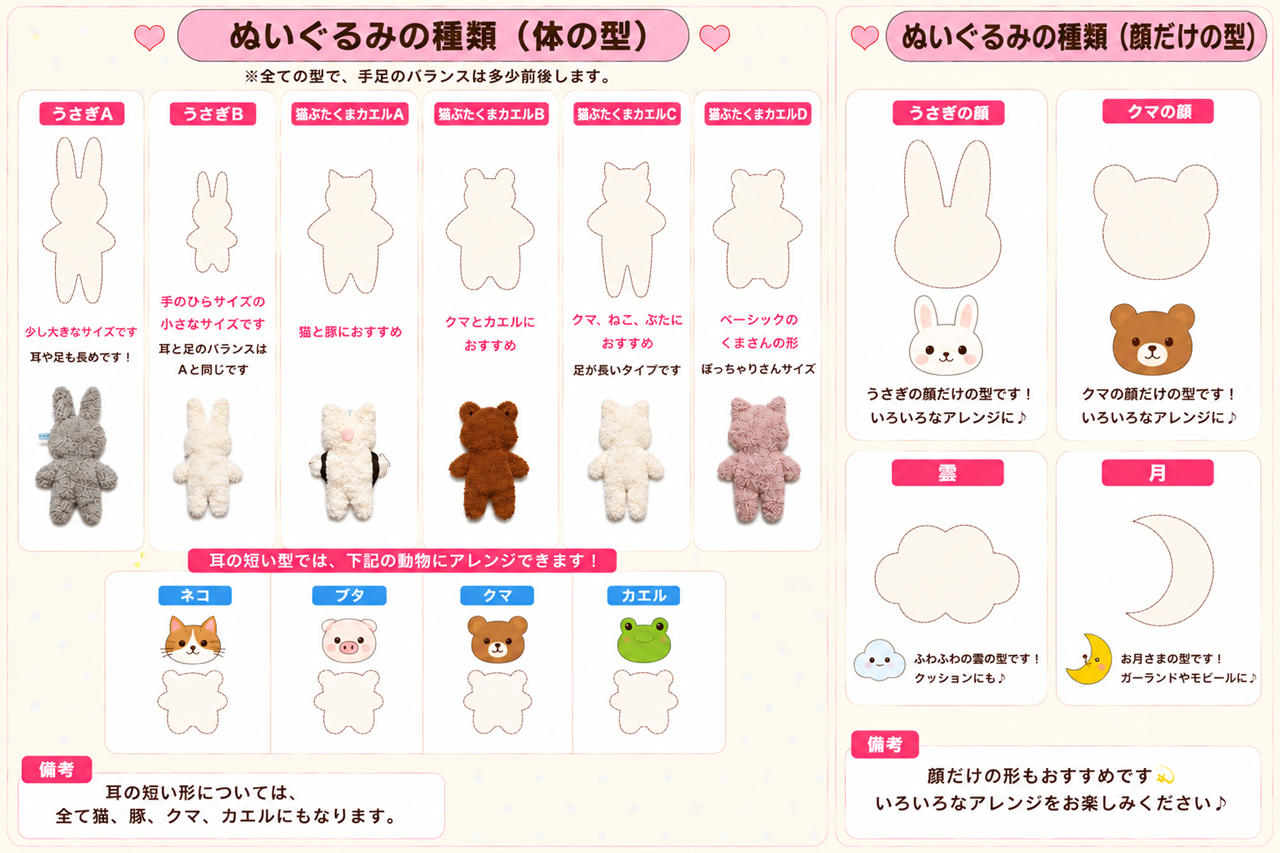
List of plush toy molds
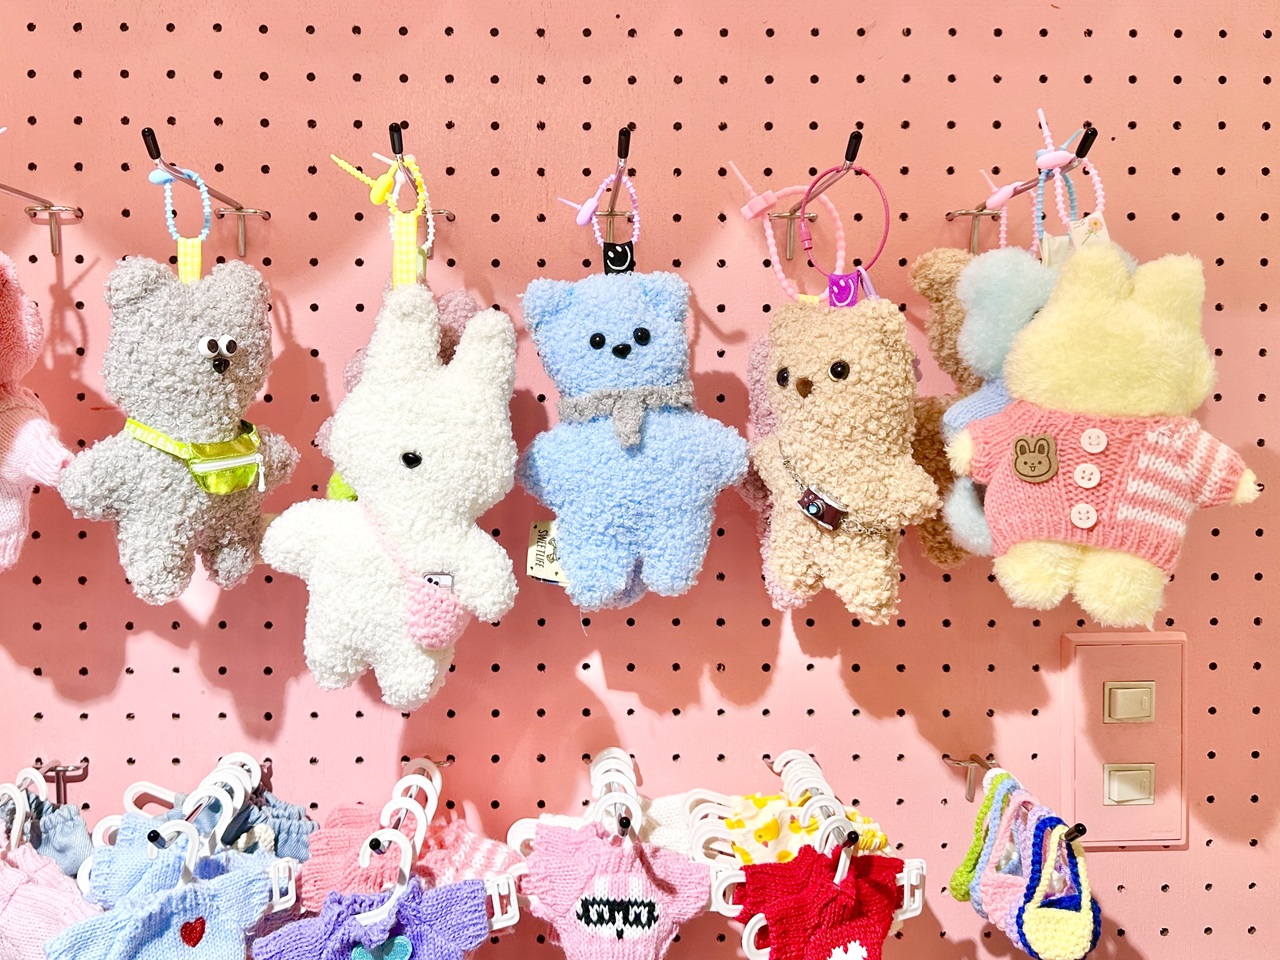
Image of the finished product
The fabrics included short-haired and curly fur, and a wide variety of colors were available, including white, yellow, pink, light blue, beige, brown, gray, and black .
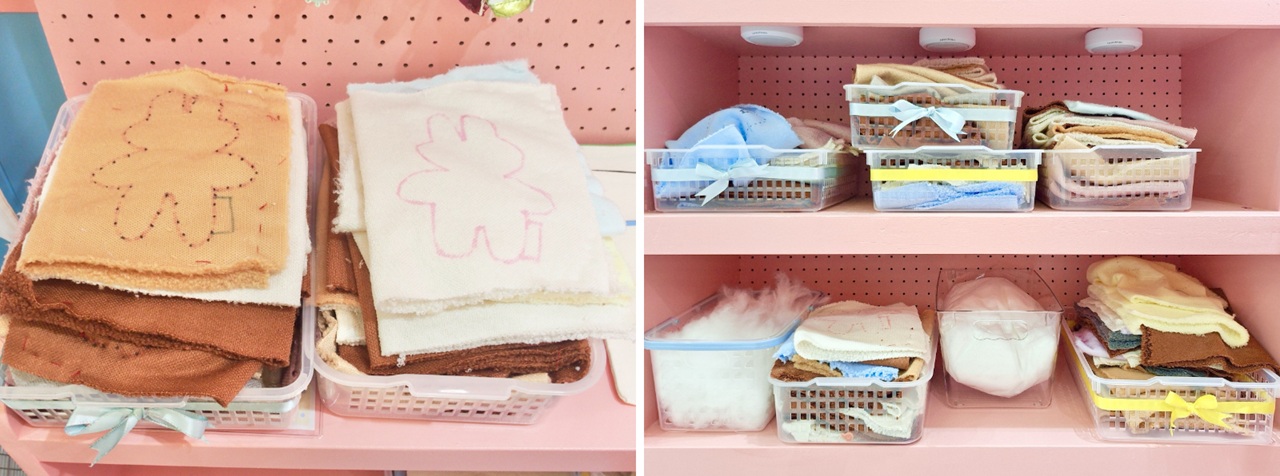
A pile of fabric with the pattern imprinted on it.
Since the fabrics weren't sorted, it took a little effort to find the desired style and color combination among the huge piles of fabric. It was fun, like a treasure hunt, but they said they plan to improve this in the future.
Please note that I chose the small rabbit mold, but the mold I used was from the pre-opening period and appears to have a slightly different shape from the one used at the official opening. Please consider this only as a reference to get a sense of the workshop atmosphere.
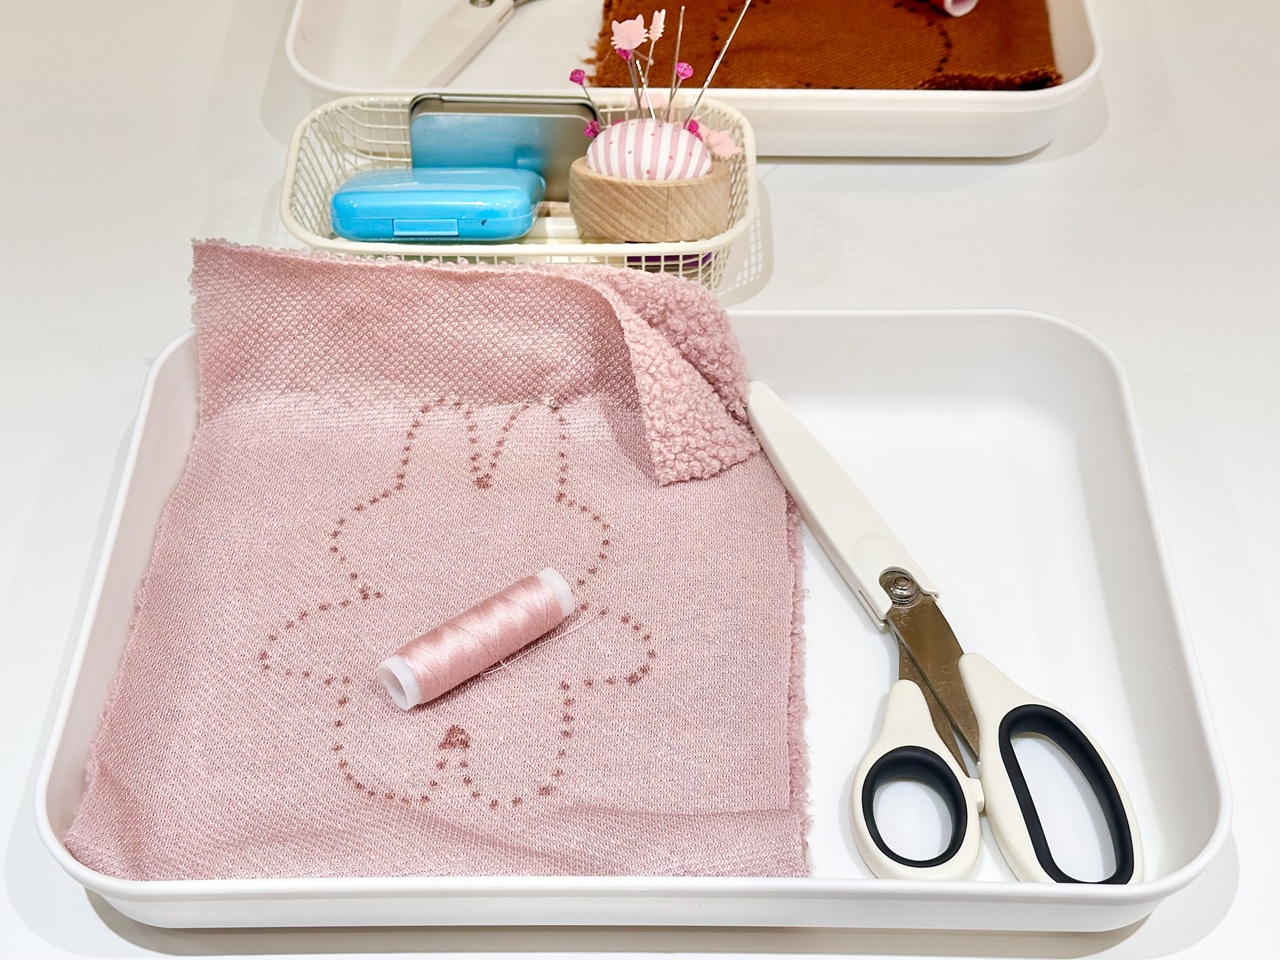
Fabric with a rabbit pattern
[Experience Report: Step 2] Sewing the base body together
Once you've chosen your fabric, you can start sewing the base piece together. Basically, you just sew along the pattern , leaving a 3cm opening (a space to turn the fabric inside out).
"You can use a simple running stitch, but I recommend backstitching to make it sturdier," the staff member advised, but my memories of home economics class were long gone. As someone who usually only sews on buttons, I was thinking, "Backstitching…what's that…?"
However, there's no need to worry , as the instructions include diagrams explaining how to sew, including knotting and securing the ends, and you can also watch demonstration videos on a tablet. If necessary, you can ask for direct guidance. After a few tries, you should get the hang of it.
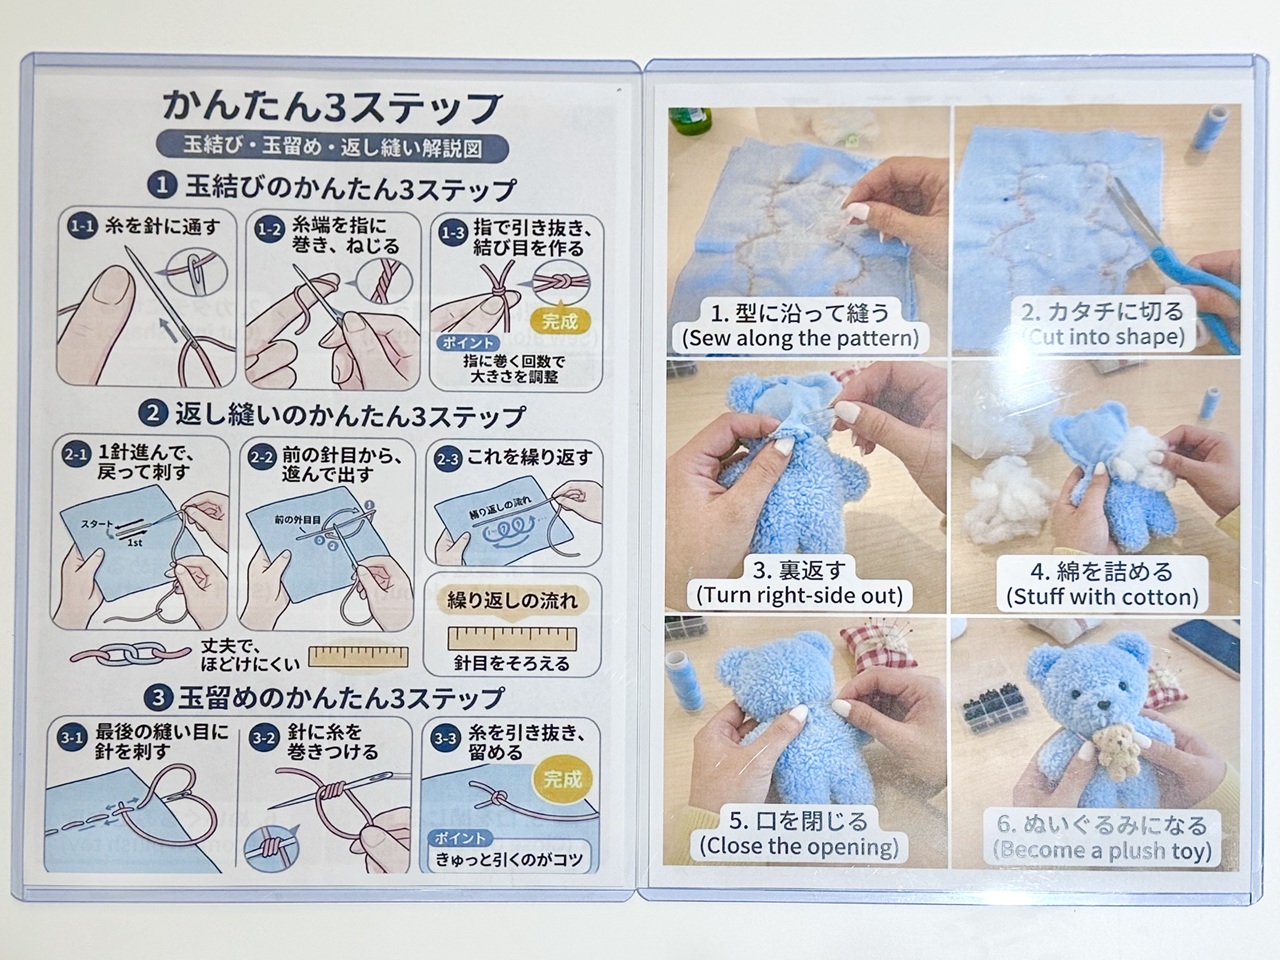
Sewing instructions diagram
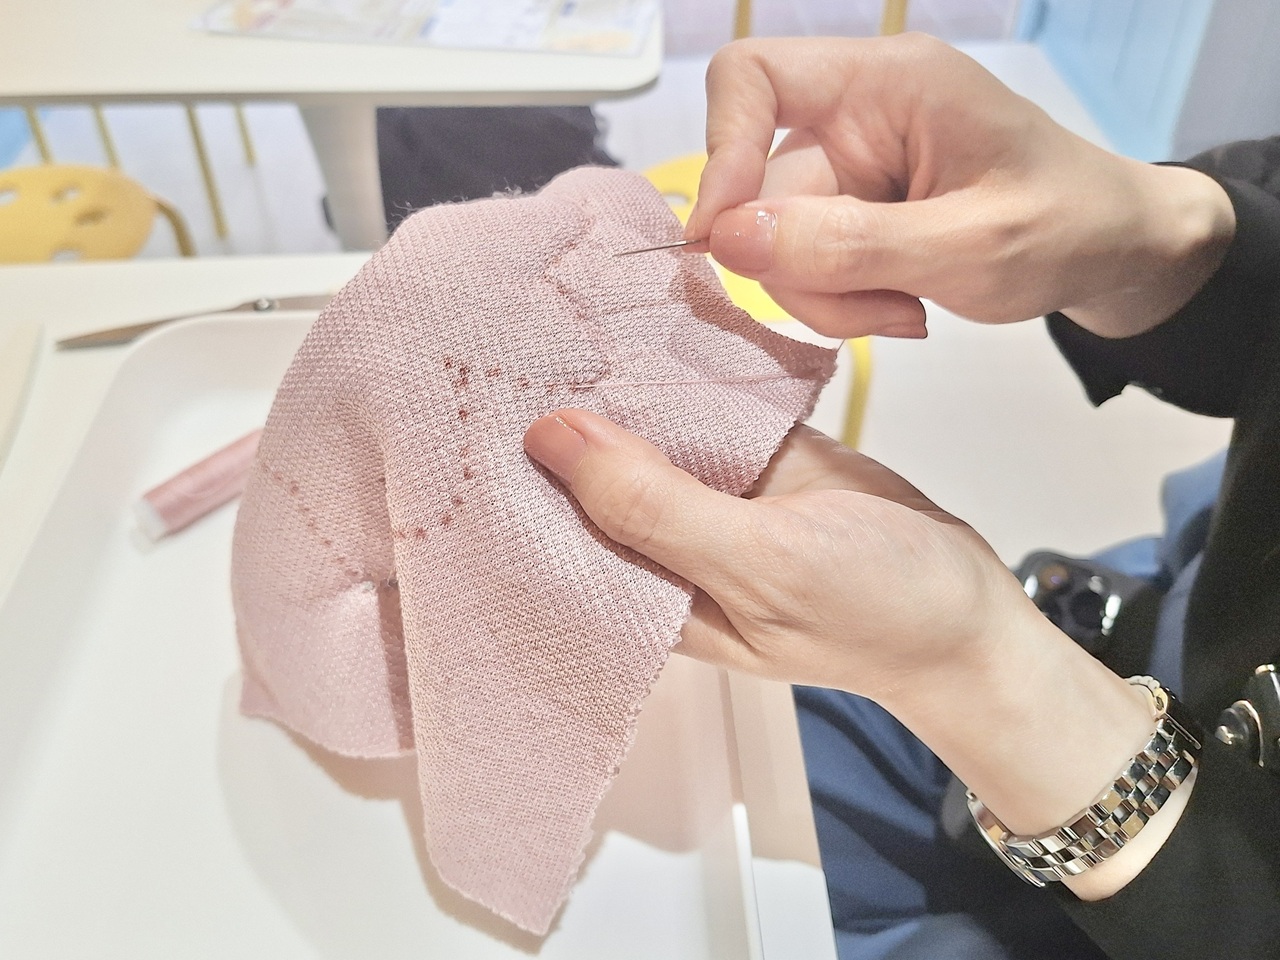
The process of sewing step 3
One thing I realized after starting to sew was that I naively thought that "matching the fabric and thread colors would result in a neat finish," but of course, using the same color makes it difficult to see the stitches. In fact, there were times when I accidentally damaged the fabric when trying to undo a stitch. If you turn the fabric inside out, the stitches are almost invisible, so if you want to make the work easier, I recommend using different colors for the fabric and thread .
Since I lacked the necessary skills, I sewed as carefully and meticulously as possible, and after about 40 minutes, I finished sewing the main body together. It was a simple process, but it was a time when I could become completely absorbed in it.
[Experience Report: Step 3] Cutting and Stuffing
Once the sewing is finished , cut the fabric, leaving a seam allowance of about 1 cm. For areas with sharp curves, making small cuts towards the seam will create a neater curve. I proceeded carefully, making sure to find the line that was just barely not touching the thread.
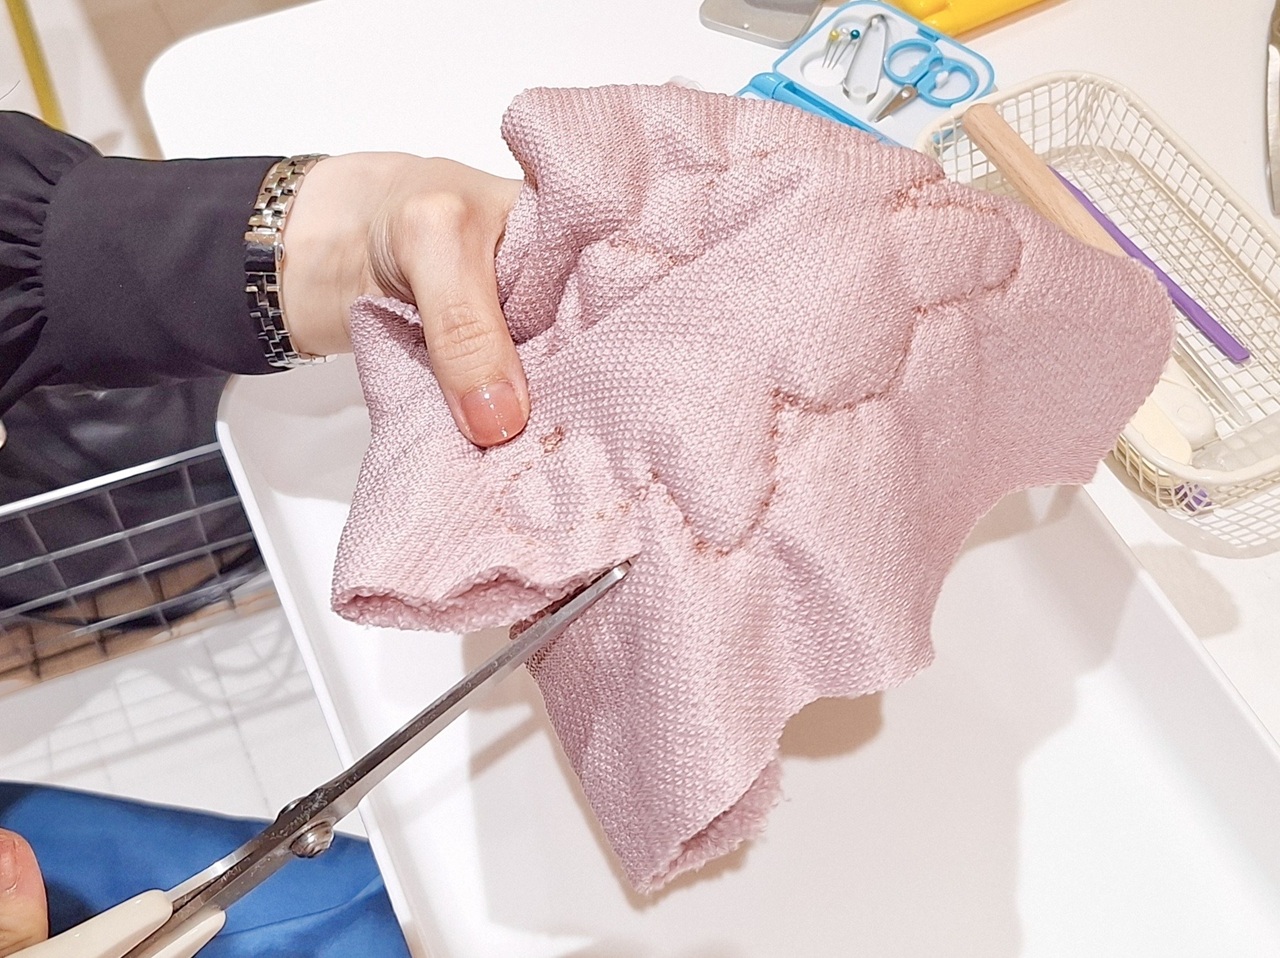
The cutting process
Once you've finished cutting, slowly turn the fabric right side out through the opening. If the opening is too small, this step will be quite difficult, so I recommend leaving it a little wider than necessary. Once you turn it right side out, it instantly starts to look like a stuffed animal, even if it's a bit misshapen, which is really exciting!
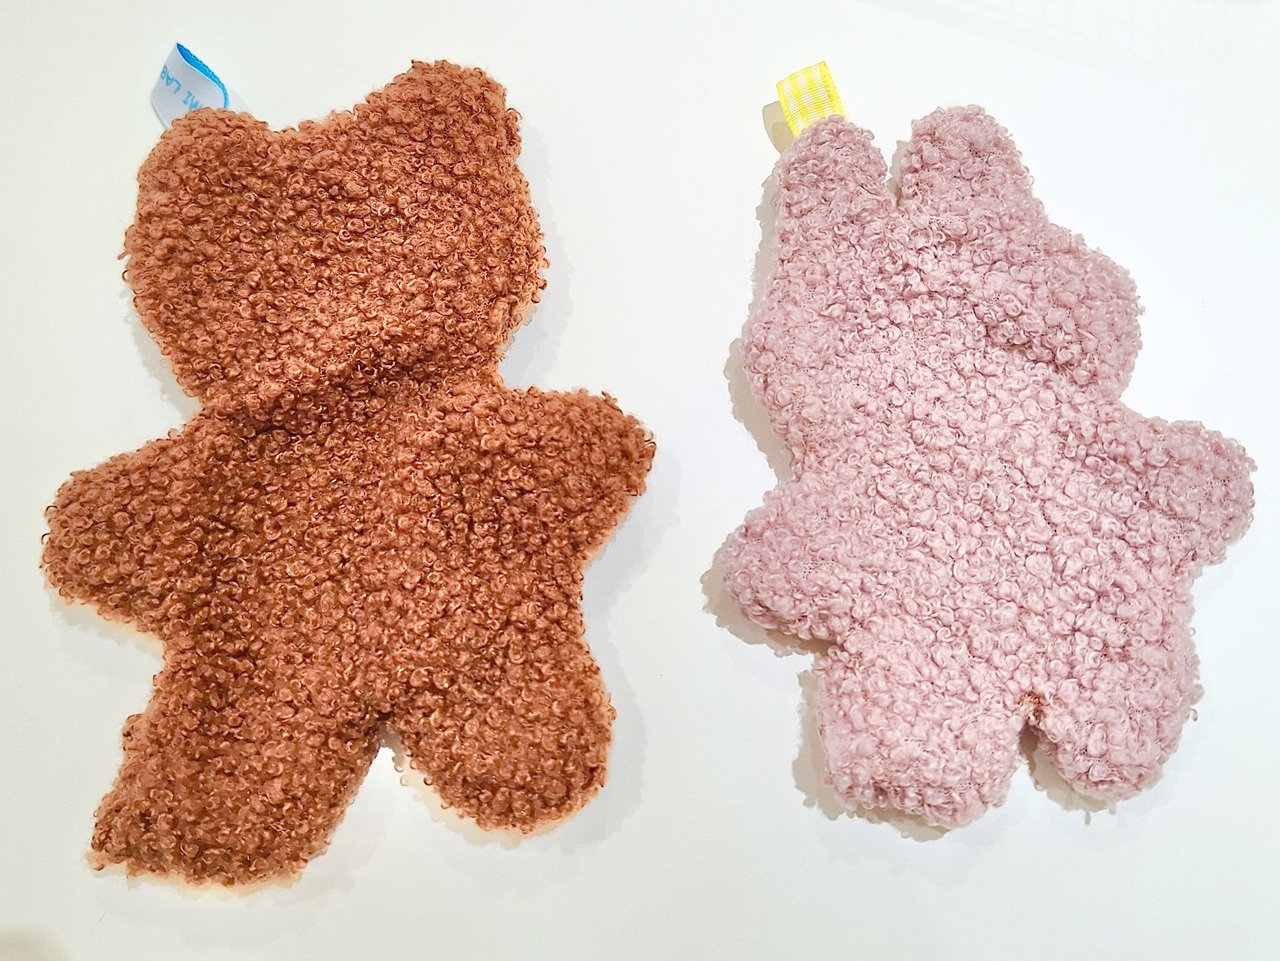
Turned over
It was only at this stage that I noticed a tag for the strap had been sewn onto the top of the head beforehand. It was truly thoughtful.
Next, we move on to the final step in creating the base body: stuffing. Loose, fluffy cotton is gradually inserted through the opening, and a special stick is used to push it into the recessed areas such as the ears and hands. The amount of cotton can be adjusted to your preference, whether you want the plush toy to be "floppy" or "puffy."
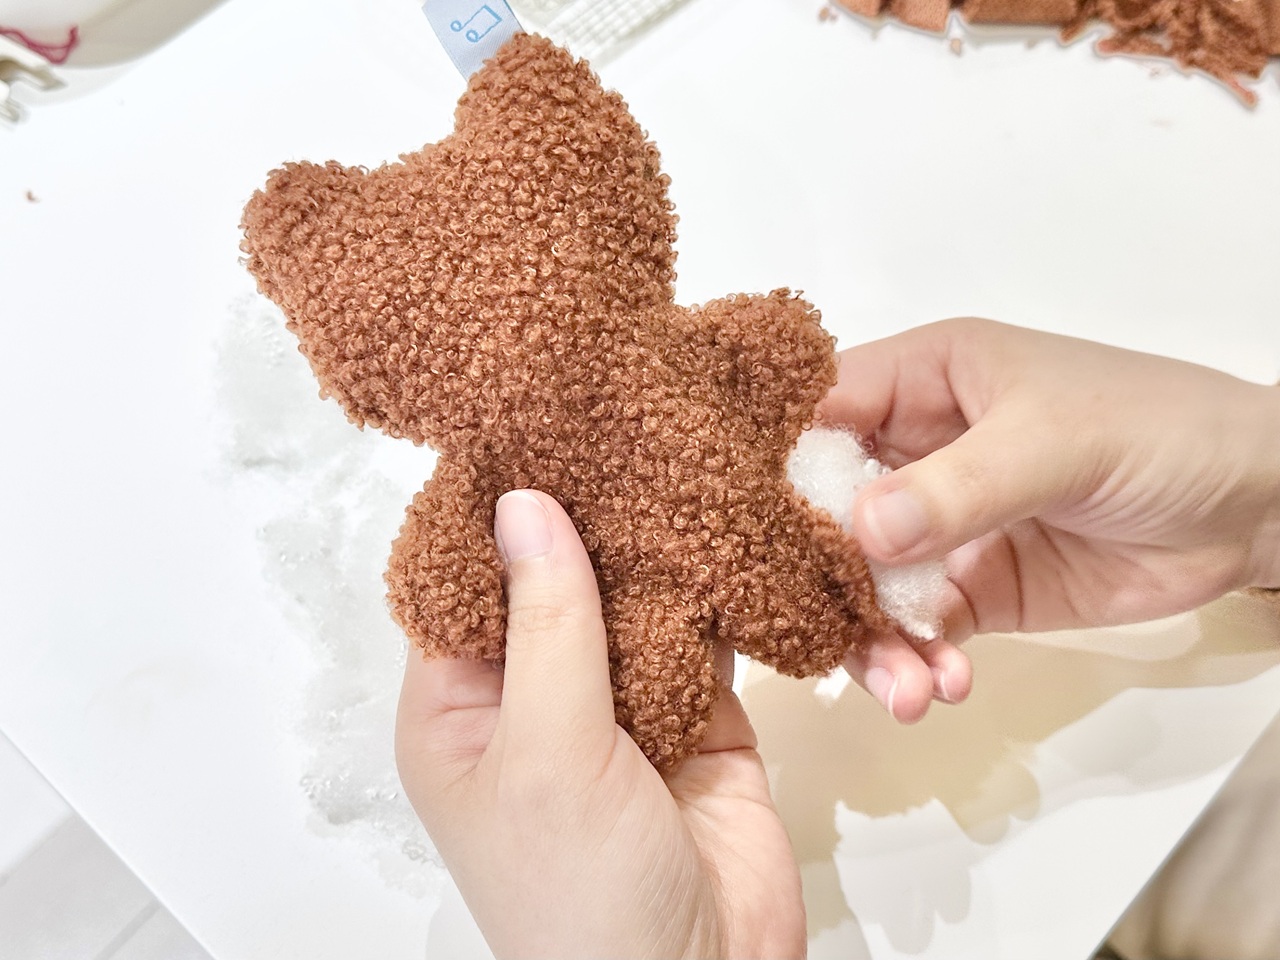
The process of stuffing with cotton
I encountered trouble here as well. In my eagerness to make it plump, I stuffed too much cotton in, causing the threads around the feet to break… Moderation is key in everything. I was taught a way to repair it so that the stitches wouldn't be noticeable from the outside, and everything turned out alright.
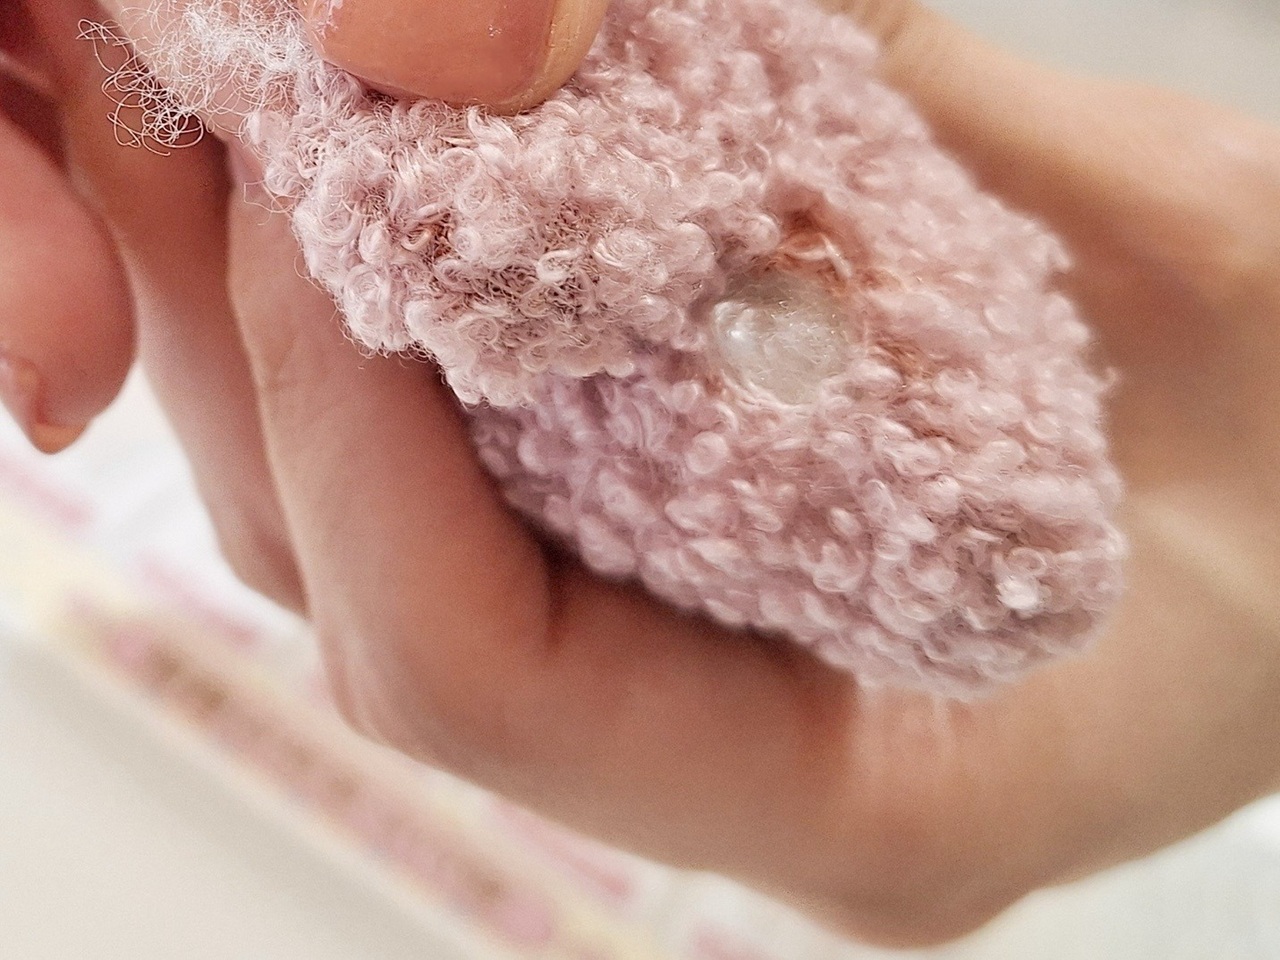
An example of a failed product where the cotton filling was exposed.
Once you've achieved a satisfactory three-dimensional shape, neatly close the opening and the base figure is complete .
[Experience Report: Step 4] Choosing Options
Once the base body is complete, it's time for the happy part: choosing facial features, clothing, and other decorative options!
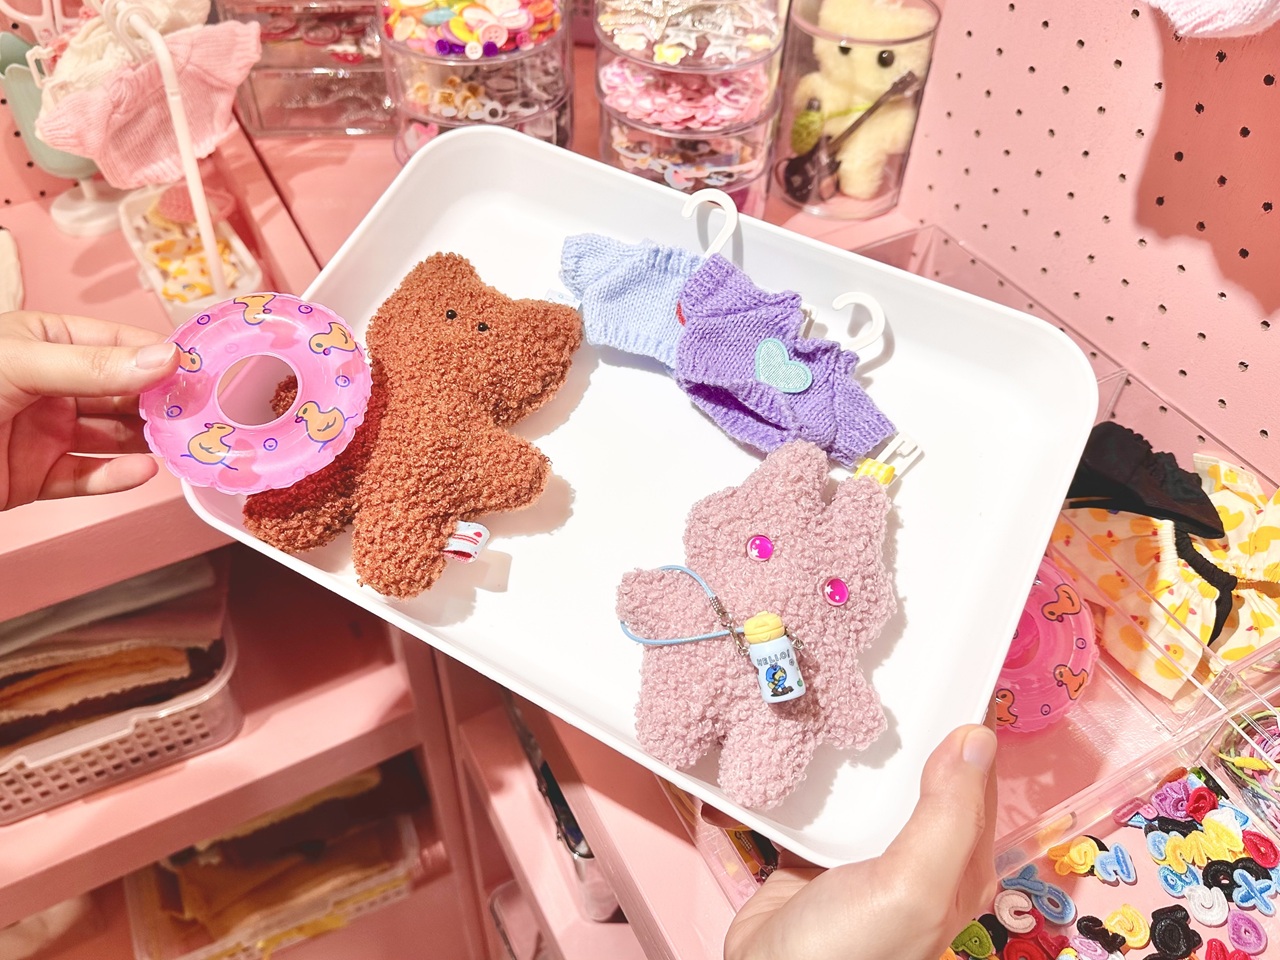
The process of choosing options
You don't need to return to your table each time; you can take your work tray with you to the options corner. You can arrange the parts that interest you on top of the base figure to get a feel for the finished product. Also, since there are dozens of types of eye parts, you can take the entire case back to your table to choose from, as long as it doesn't inconvenience other customers.
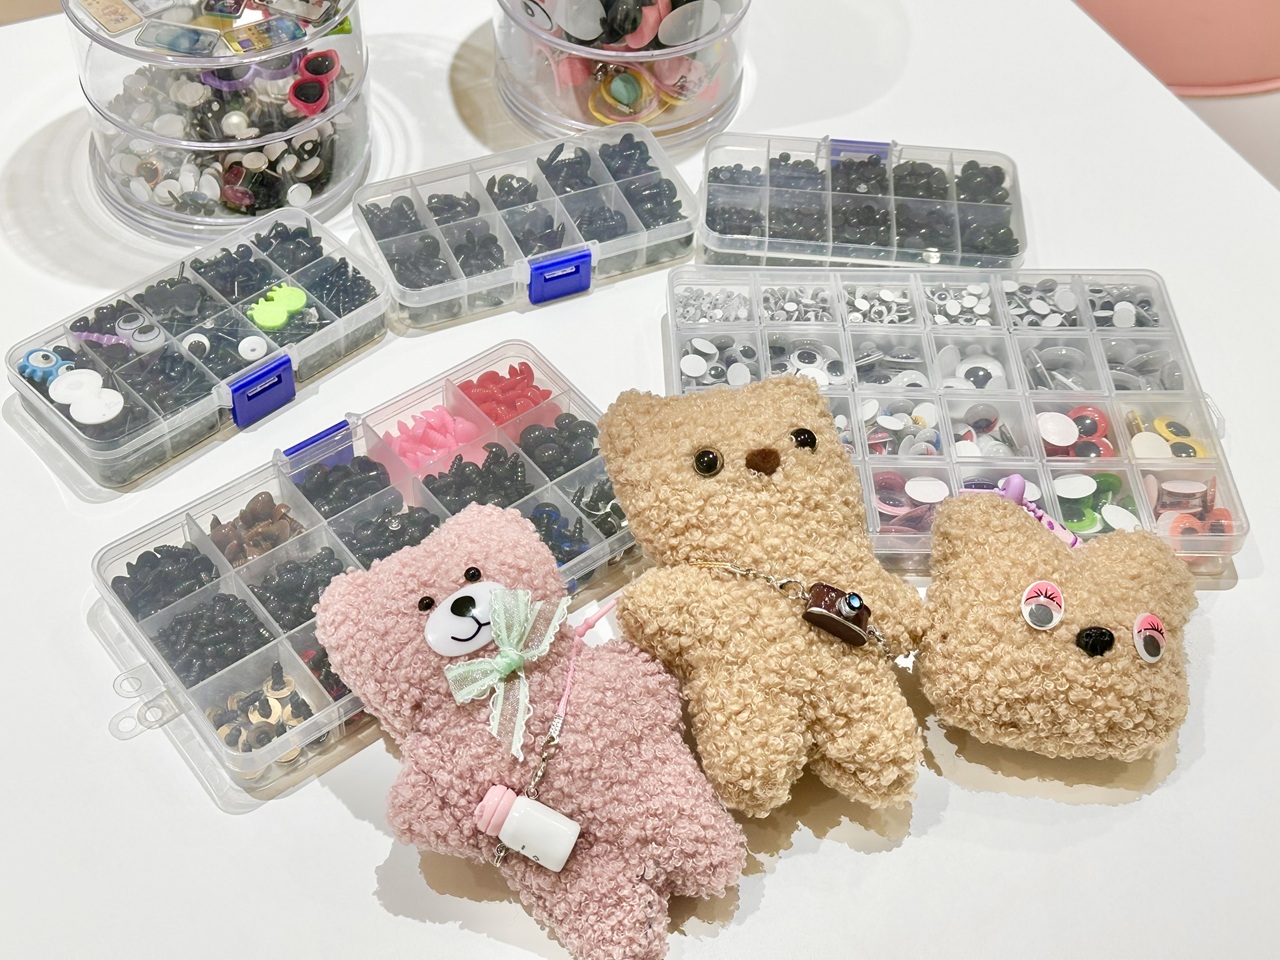
A large number of eye parts
From simple black eyes to eyes with four whites showing, sexy eyes with long eyelashes, and shojo manga-style eyes with star highlights, each has its own unique cuteness. After being told, "It would also be unique and cute to use buttons instead of eyes," I pondered for several minutes… I wanted to create a character that looked like an extraterrestrial, so I decided on red eyes with sparkling stars. By deliberately omitting a nose and mouth, I created a mysterious atmosphere.
Finally, attach any parts that need gluing, dress the plush toy in clothes and a bag, thread the strap through… and your plush toy is complete!
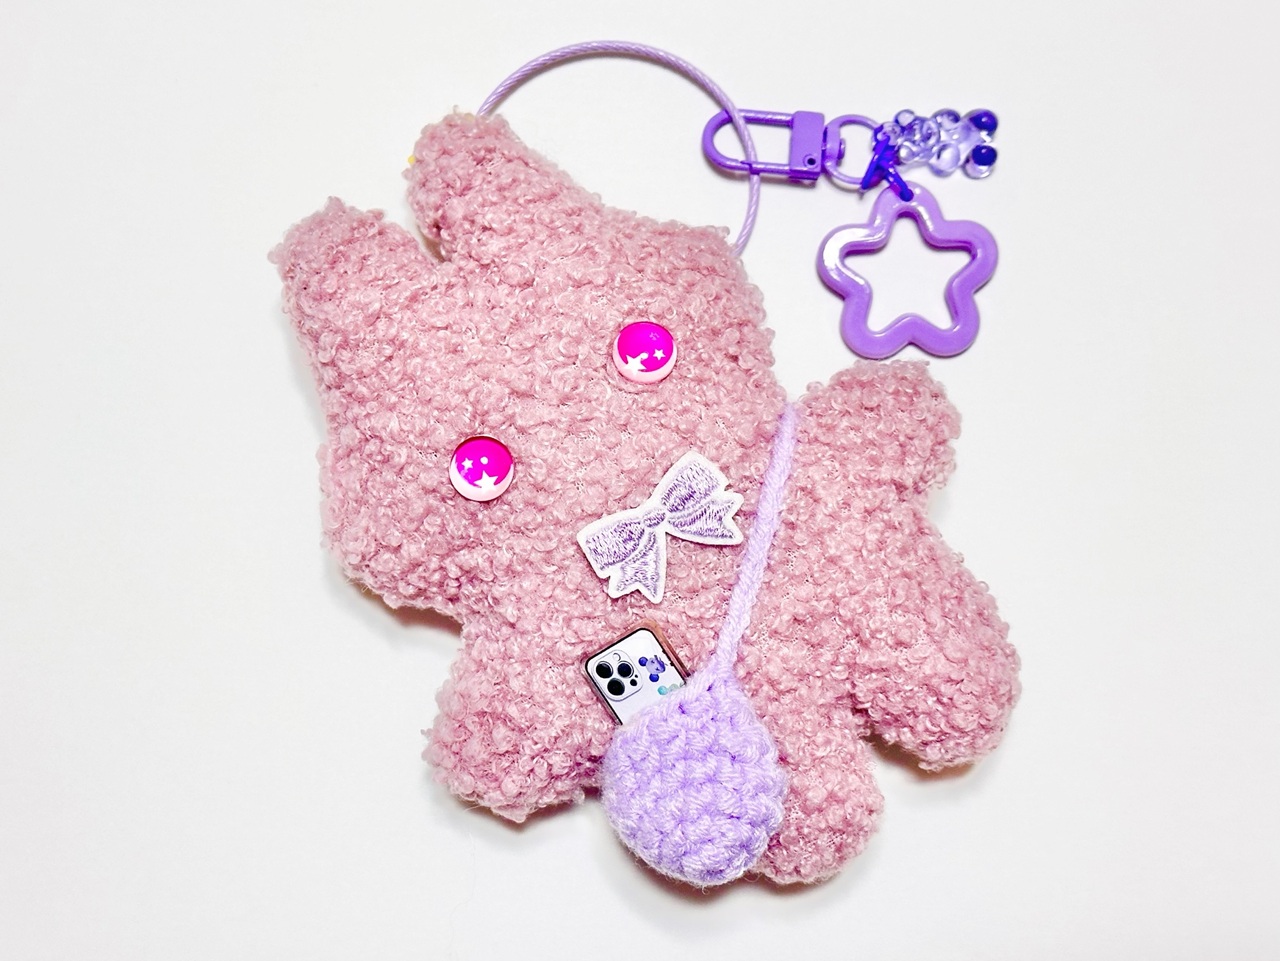
Successfully completed!
A one-of-a-kind plush toy is complete!
Holding my handmade stuffed animal in my hands filled me with a sense of accomplishment and fulfillment. At first, I was in interview mode, but gradually I grew attached to it as a personal project, and I realize now that I got quite engrossed in choosing the options.
Of course, the patterns and materials were provided by the store. However, I never imagined I could make a stuffed animal myself, so having the result of my own efforts, from every stitch to every last bit of stuffing, in my hands is incredibly moving.
The time spent encouraging each other with comments like, "You're doing great!" and "The imperfections add to the charm," was incredibly relaxing. We noticed that our creations were quite similar, even though neither of us was wearing clothes or even touching our noses, and we discussed whether we should try to differentiate them for the article. In the end, we prioritized our own preferences, which, looking back, is a fond memory.
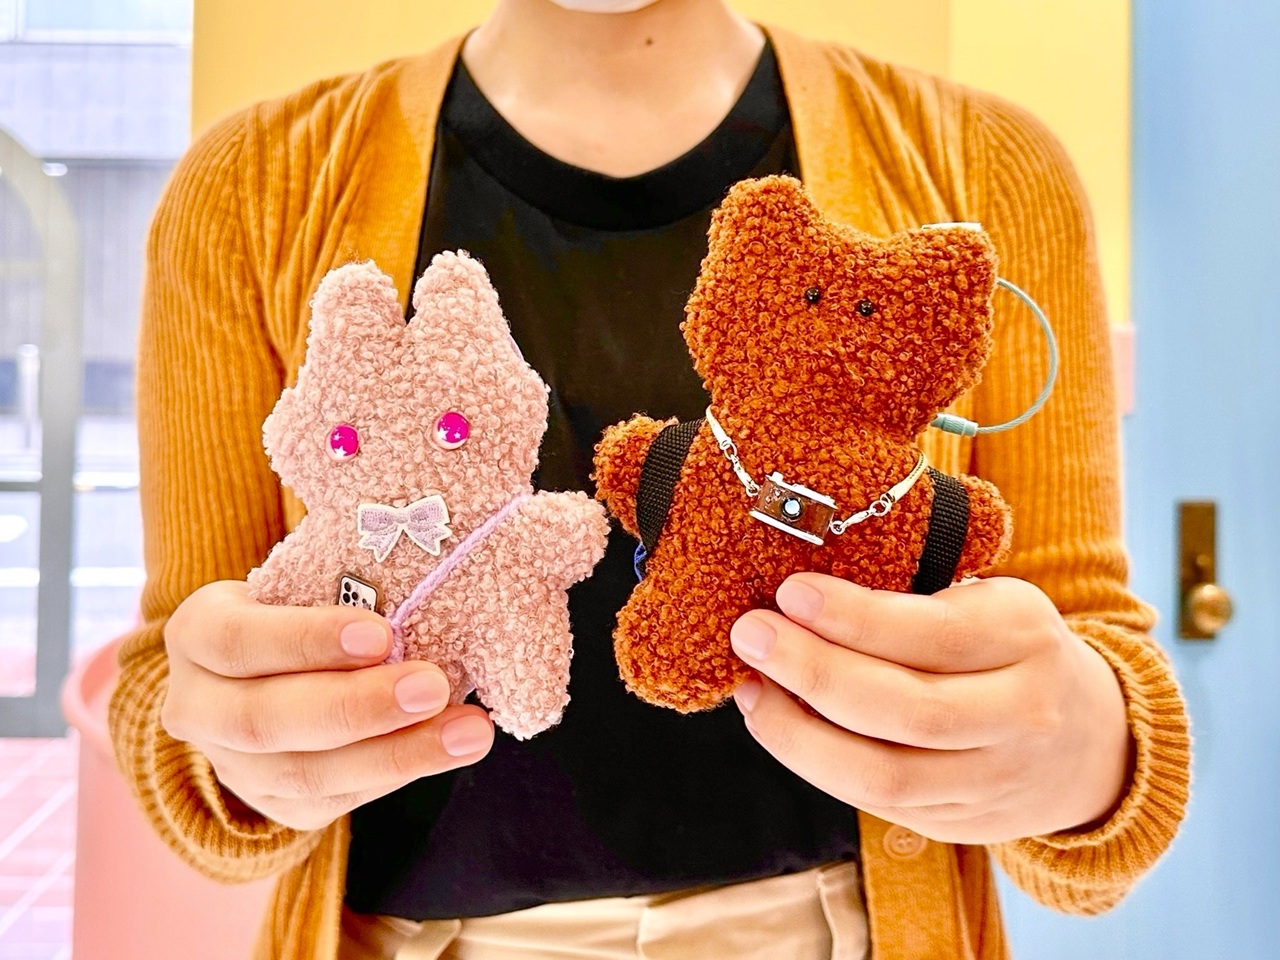
Handheld size
The store anticipates the task to take 1 to 1.5 hours. In my case, including time for photography and interviews, it took about 1 hour and 40 minutes from entering the store to completing the plush toy . So, I felt that it's basically a task that can be completed in 1.5 hours, and is something that even beginners can easily try.
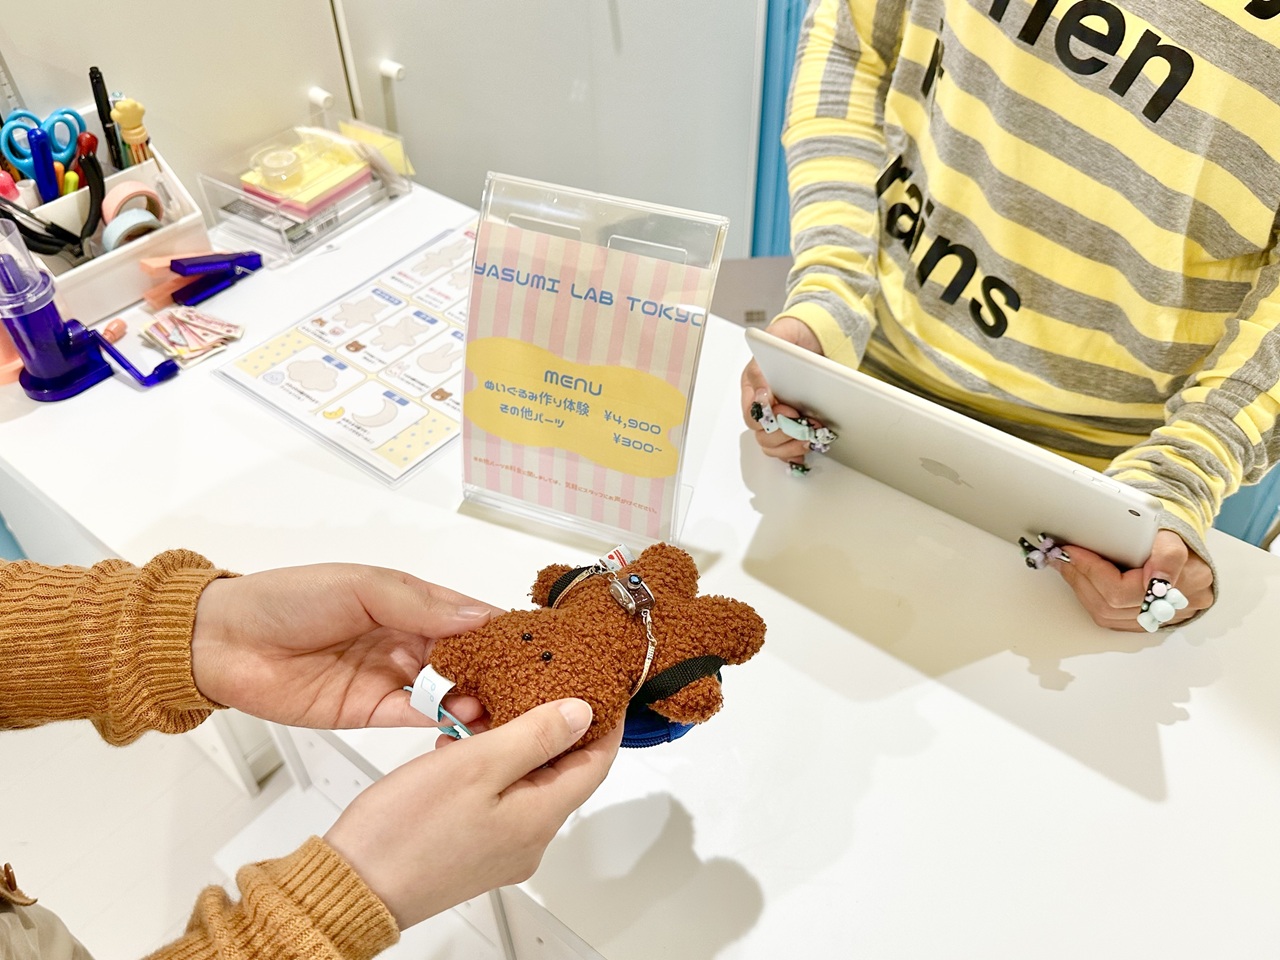
The accounting process
Once the stuffed animal is finished, you pay at the cashier counter. We both added options as we pleased, but each only added around 500 to 1,000 yen extra, so please keep that in mind.
Let's start enjoying "plushie activities" right away!
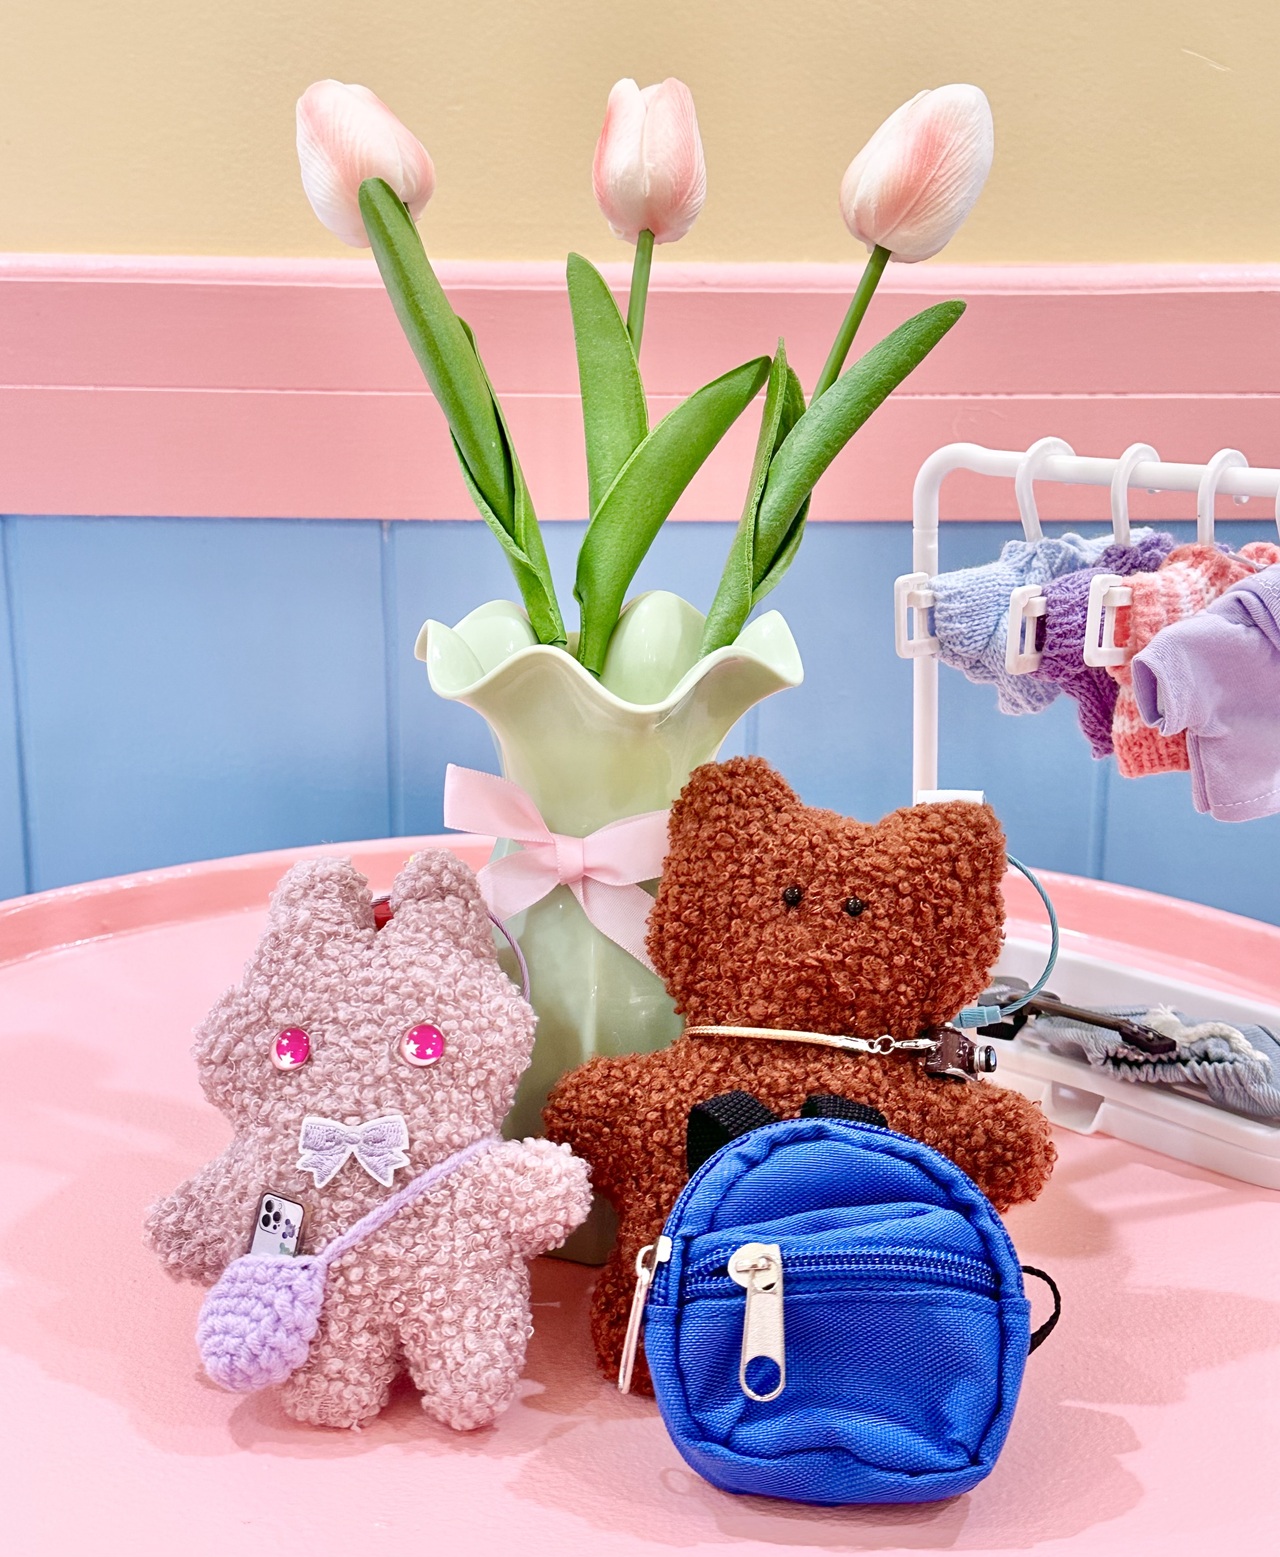
Photo spot
When I asked the staff if we could take some commemorative photos, they kindly showed me some photo spots in the store that would look great on social media.
Even after taking photos to my heart's content at the store, my excitement didn't subside, so I decided to continue my plushie-photography activities with my companion. We relaxed in a park where we had no particular reason to be, looked for beautiful scenery, and enjoyed a fun journey home that was different from my usual reporting trips. Ikebukuro, in particular, has many stores that sell "plushie clothes," so it would be fun to stop by there on the way back from a workshop.
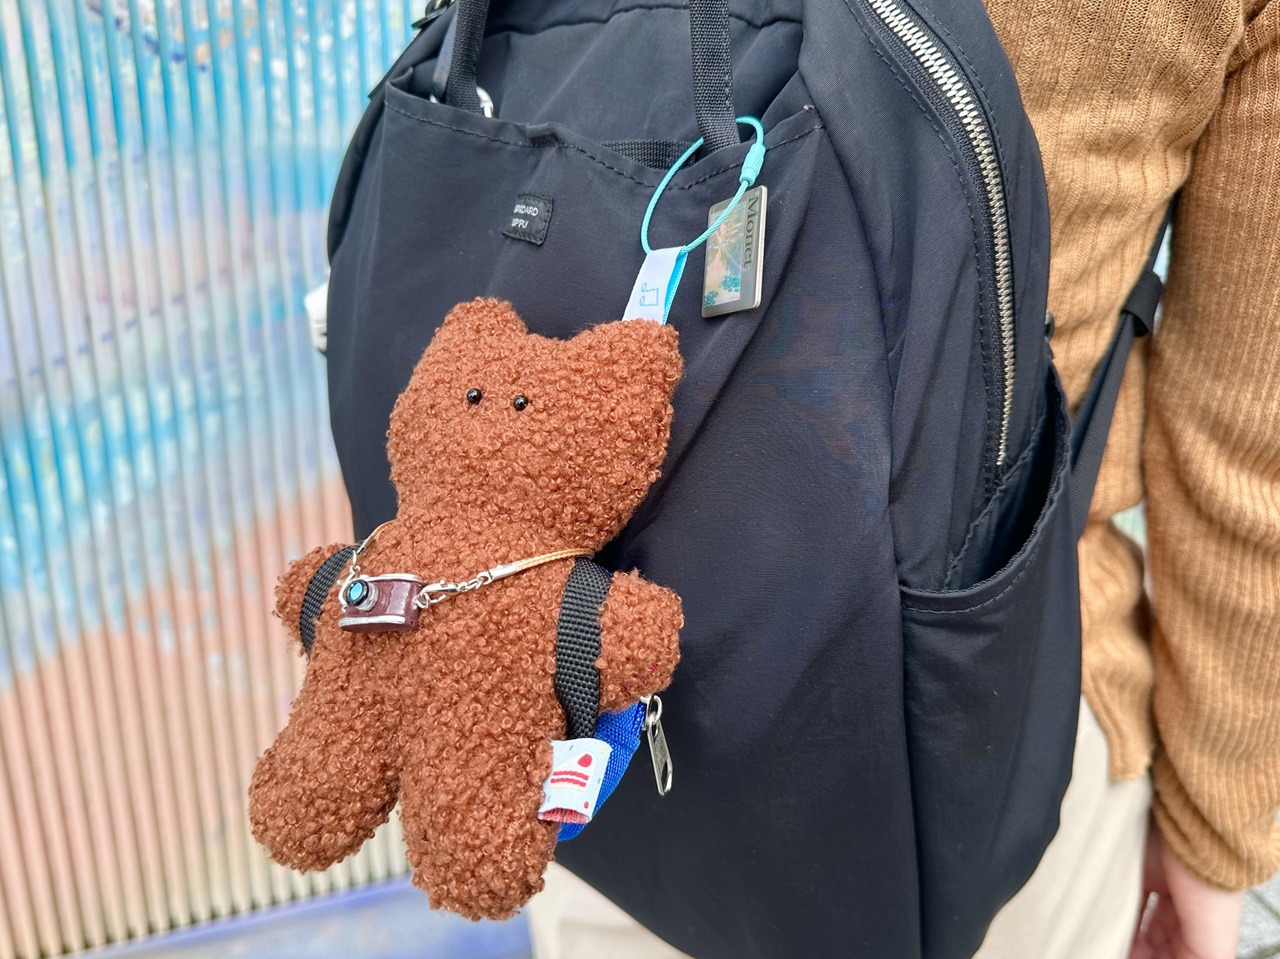
Attach it to your bag and go out.
When I think about why more and more people are becoming captivated by plushie collecting, I believe it's not just because of the pure love of wanting to show beautiful scenery to your favorite companion, but also because there's the joy of imbuing your own individuality into how you capture the world .
Beautiful scenery and delicious-looking food at travel destinations. In this age where anyone can take beautiful photos just by pointing their smartphone, my photo folder, as someone who doesn't take selfies, tends to be filled with photos that "look the same no matter who takes them." They're beautiful, but they don't quite feel like personal memories—that's the feeling I get.
However, simply adding a stuffed animal instantly transforms the scene into "my own world." The perspective of "I saw this scenery with this little one, and this is how I felt" is captured in the photograph as a warmth. Even if you feel embarrassed to make yourself the main subject, having a stuffed animal as a companion that proves "I was there" instantly transforms an ordinary day into a special location. Isn't that the charm of stuffed animal collecting?
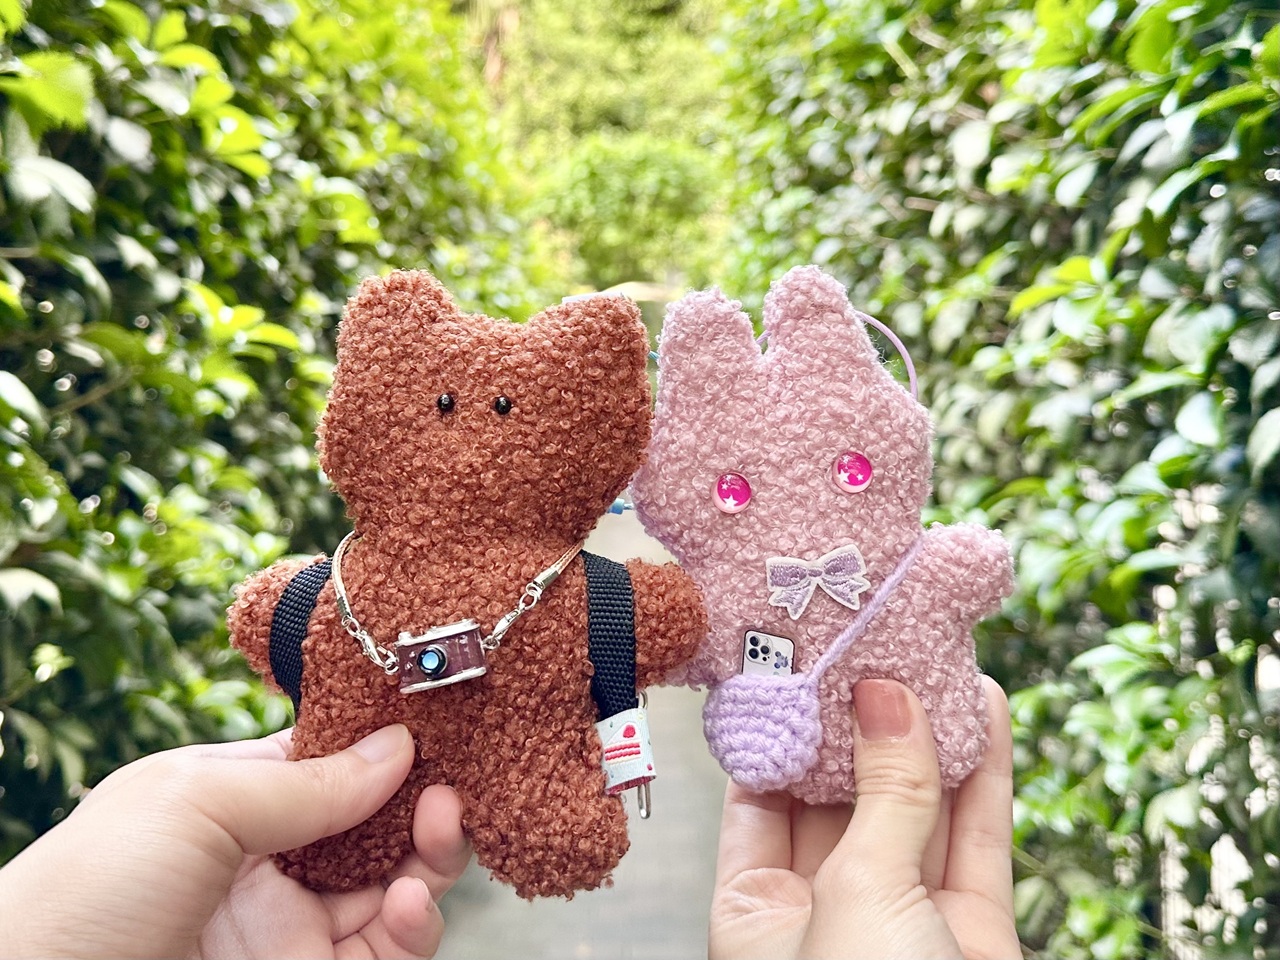
"Nui-katsu" – cherishing memories in ordinary scenery.
YASUMI LAB TOKYO is a place where anyone, regardless of experience level, can easily create a one-of-a-kind stuffed animal that isn't a mass-produced item. The fact that the creation process itself becomes a wonderful memory is also a major draw of this shop, so why not pay them a visit?
Location: Room 102, Maison Fuji, 4-29-2 Ikebukuro, Toshima-ku, Tokyo
*Approximately 10 minutes on foot from the west exit of JR Ikebukuro Station.
Opening hours: [Monday-Friday] 15:00-20:00 [Saturday-Sunday] 11:00-20:00
Basic fee: 4,900 yen (tax included)
*A campaign is currently running until June 30th, 2026 (Tuesday) where the basic fee is 3,900 yen. However, the price may change in the future, so please check the official booking website for details.
*Additional charges of approximately 100 to 300 yen will be required for each option you choose, such as clothing or patches.
Estimated time: 1 to 1.5 hours
Official reservation site: https://yasumiworks.stores.jp/reserve/Yasumi-tokyo
Instagram account: https://www.instagram.com/zzzlab.tokyo
*This article is based on information available at the time of reporting. Please note that it may differ from the latest information.
<Related articles from the past>
[Interview Report] Komeda's Stand Cafe "Jericho-do" Opens in Ikebukuro! Offering relaxation with over 1,000 combinations of "Jericho"
